
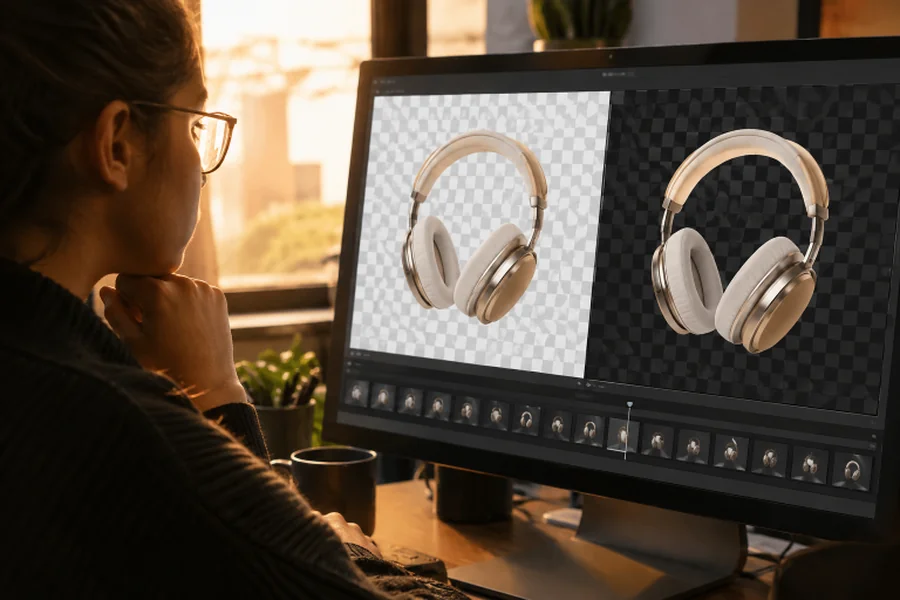
How To Prepare Transparent Animated Loops For Websites, Social Posts, And Presentations
Transparent animated loops let a moving subject sit naturally over many designs without carrying a visible rectangle behind it. A mascot can wave over a colored landing page, a product can rotate on a presentation slide, and a reaction can appear over a custom social graphic. A dependable GIF background remover can speed up the first stage, but polished results still require thoughtful source selection, cleanup, and testing.
The goal is not simply to erase a background. It is to create a short animation whose edges remain stable from frame to frame, whose loop feels intentional, and whose file format suits the place where it will appear. Preparing the asset for its final use helps prevent rough cutouts, distracting flicker, slow loading, and unexpected opaque backgrounds.
Why Transparent Loops Matter
A transparent loop separates motion from the surrounding layout. Instead of rebuilding an animation for every background color or slide theme, designers can reuse the same cutout over light, dark, photographic, or branded surfaces. This is especially useful for product demonstrations, animated logos, stickers, reactions, and motion overlays that need to fit more than one channel.
A clean subject also gives the surrounding design more room to work. Text, calls to action, and interface elements can remain visible because the animation occupies only the pixels it needs. That flexibility is valuable, but it also makes poor masking more obvious. Any fringe or leftover background color will be visible against a new backdrop.
How Animated Transparency Works
Animated transparency means some pixels are fully or partly see-through while the animation plays. Unlike a single cutout image, an animation contains a sequence of frames, and each frame must preserve the subject’s shape and edge quality. The GIF format, for example, can store multiple images as animation frames, but its palette and transparency limits make it less suitable for soft, photographic edges.
That limitation matters with hair, smoke, glass, shadows, reflections, and motion blur. These details often contain partially transparent pixels rather than a hard boundary. If the export format supports only on-or-off transparency, those areas may look jagged or disappear. A consistent original background makes it easier for a tool or editor to identify which pixels belong to the subject throughout the loop.
Choose The Right Source Clip
Background removal is easier when the source footage is short, sharp, and visually simple. Start with the highest-quality original available rather than a compressed copy downloaded from another platform. Remove unused lead-in and ending frames before processing, so effort is focused on the motion viewers will actually see.
What To Look For Before Editing
- Choose a clear contrast between the subject and background whenever possible.
- Avoid heavy motion blur, especially around hands, hair, wheels, and thin objects.
- Check that small details remain visible while the subject moves.
- Prefer a stable camera shot over a scene with rapid reframing.
- Plan a natural beginning and ending position if the asset must loop continuously.
Remove The Background Across Every Frame
Removing a background from one still image is not the same as removing it from an animation. An automated tool may identify the subject well in one frame but make a slightly different decision in the next. Those small changes can create a shimmering outline when the animation plays.
Automated subject detection is practical for people, products, and simple scenes. Color-key methods can be effective when the subject is filmed against a distinct green, blue, white, or black background. Complex scenes, overlapping objects, and similarly colored foreground and background areas may need manual masking or frame-by-frame correction. Review the entire clip after processing, not only the frame that looks best.
Check Edges, Motion, And Flicker
A cutout can look convincing when paused and still fail in motion. Preview it repeatedly at normal speed, then slow it down to identify inconsistencies that pass too quickly during casual viewing. Test it over both white and black backgrounds, plus a color close to the design where it will be used.
- Look for crawling or pulsing outlines around the subject.
- Inspect hair, fingers, spokes, packaging edges, and transparent materials.
- Watch for leftover background colors that create a halo.
- Check whether any part of the subject pops in or out between frames.
- Confirm that the end returns smoothly to the beginning.
Pick The Best Output Format
Use the format that matches the destination rather than relying on one export for every placement. File size, transparency behavior, image quality, and playback support all affect the choice.
- GIF: Useful for simple stickers and broad legacy compatibility. It is best for limited-color artwork and hard edges, because it uses a restricted color palette and basic transparency.
- WebM: A practical choice for website overlays when the intended browser and delivery workflow have been tested. Some WebM encoding workflows can retain alpha transparency.
- MP4: Widely used for social video and presentations, but typical MP4 delivery does not preserve a transparent background. Use it when a solid or designed background is acceptable.
- APNG: Useful when animated image quality and alpha transparency matter. Confirm that the destination supports it before making it the only deliverable.
For browser-based video decisions, the browser video codec guidance is a useful reminder that container format, codec, and browser support are related but not identical considerations.
Optimize For Websites And Social Media
Trim transparent empty space around the subject so the visible animation occupies the file efficiently. Resize it for the area where it will display, keep the action focused, and reduce frames only when the motion still looks smooth. A small overlay does not need the same pixel dimensions as a full-screen social post.
Always test the final upload or embed in its destination. A platform may recompress files, convert formats, limit file sizes, or place a background behind the animation. Test on desktop and mobile, and check loading behavior on a typical mobile connection before publishing.
Common Use Cases
- Product pages: Show a rotating product or a feature in use without a distracting setting.
- Presentations: Add controlled motion while preserving the slide’s typography and color system.
- Social graphics: Layer a mascot, reaction, or object over campaign-specific artwork.
- Messaging stickers: Create compact animations that fit light and dark interfaces.
- Motion graphics: Reuse one approved cutout as an overlay in multiple edits.
Mistakes To Avoid
- Expecting a low-resolution or heavily compressed source to produce sharp edges.
- Approving the animation after viewing only its first frame.
- Choosing GIF for footage that depends on soft shadows or semi-transparent detail.
- Ignoring color spill and halos until after a new background is added.
- Exporting a file that is far larger than its display size requires.
- Forgetting to verify rights to use the original footage, artwork, or logo.
Final Quality Checklist
- Does the subject stay visually stable through the full loop?
- Do the edges look clean on light, dark, and colored backgrounds?
- Is the loop point smooth and intentional?
- Does the selected format support the intended placement?
- Is the file appropriately sized for fast loading and display?
- Has it been tested on desktop, mobile, and the final platform?
Conclusion
Strong transparent loops come from three decisions: choosing a suitable source clip, checking every frame for edge stability, and exporting in a format that fits the final destination. A short quality review before publishing prevents many common problems, including flicker, visible halos, awkward looping, and files that are too large or opaque for the intended design.